10 Tips to Organize Glass Food Storage Containers Efficiently
Start by decluttering your glass food storage containers—discard any that are damaged or mismatched. Matching each container with its lid is key to staying organized.
Store lids vertically in bins or dividers for easy access and to avoid digging through piles. Group containers by shape and size, stacking those that are the same to save space and prevent them from toppling over.
Create designated zones for lids and containers, and use clear labels to keep everything in its place.
Regularly review and reorganize your collection to maintain efficiency and avoid clutter build-up.
Keep these simple tips in mind, and you’ll discover even more ways to streamline your glass food container storage while making your kitchen feel more organized and functional. It’s all about finding what works best for you!
Key Takeaways
- Match each glass container with its original lid and store lids upright in designated bins. This way, you prevent mismatches and save space.
- Stack containers of the same shape and size together. Nest smaller ones inside larger ones for stable, space-efficient storage.
- Declutter regularly by discarding broken, chipped, or stained containers and lids. Try scheduling reviews every one to two months to keep things tidy.
- Label storage zones clearly with color-coded or printed labels. This helps you quickly identify container sizes and lid sections.
- Organize containers and lids separately by size and shape. Group uniform shapes together to make retrieval and stacking easier.
Declutter and Sort Your Containers
Before you begin organizing, gather every glass food storage container and lid from your kitchen to see what you have. Take a good look at each item, discarding any broken, chipped, or stained containers and mismatched lids.
This decluttering step helps reduce clutter and makes it easier to organize food storage efficiently. Next, separate lids from containers and sort them by size or type.
Group identical or similar-sized containers together to spot duplicates and streamline your storage system. Regularly reviewing and removing containers you rarely use keeps your collection manageable.
Match Containers With Their Lids
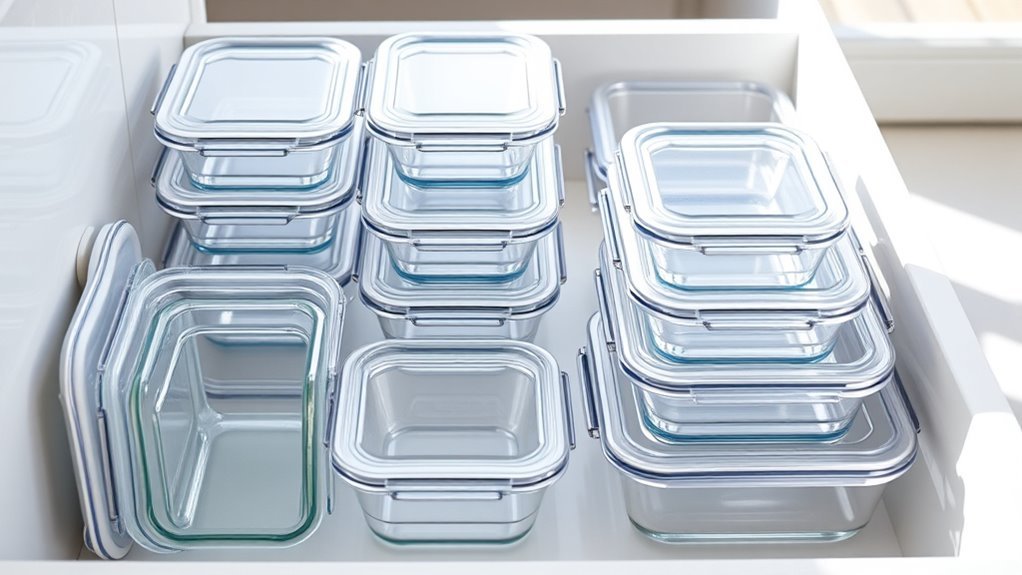
When you match each glass container with its original lid, you prevent mismatches and reduce clutter in your kitchen. Start by grouping all sets of matching lids and containers together to simplify container organization.
Keep container bases and lids in separate, designated sections for easy access during meal prep. This lid storage method helps you quickly find pairs and keeps your space neat.
Regularly check your collection and discard lids without matching containers to avoid confusion. Maintaining this system ensures you always have the right lid on hand, saving time and frustration.
Use Vertical Storage for Lids
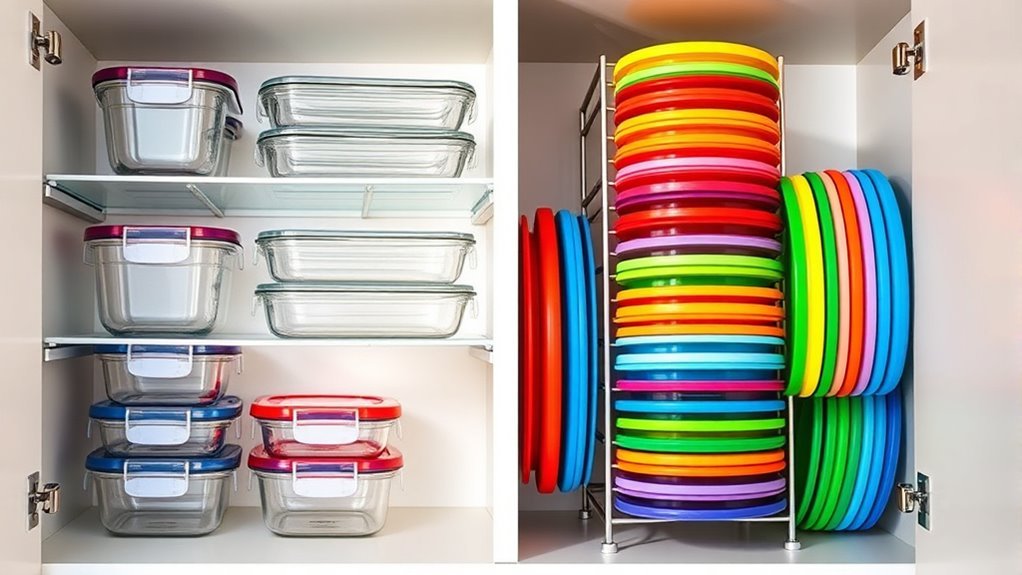
Although lids often seem like small items, storing them vertically can make a big difference in your kitchen organization. When you use vertical storage for lids, you can quickly find the right one without digging through piles.
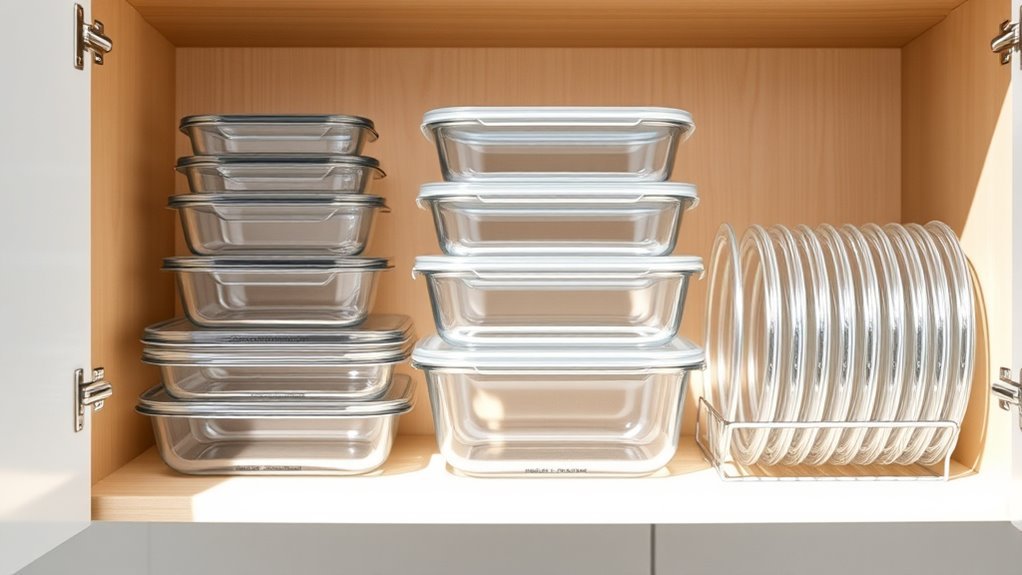
A tall, narrow bin or drawer divider keeps lids upright, reducing clutter and preventing them from toppling over. Plus, it helps keep matching sets together, making meal prep easier.
Consider these benefits of vertical storage for lids: it maximizes space efficiency in cabinets or drawers. It also simplifies retrieval and pairing of lids and containers.
And another great thing? It allows lids to air dry properly, which helps keep them clean.
Group Containers by Shape and Size
Since glass containers come in various shapes and sizes, grouping them accordingly helps you save space and find what you need faster. Start by sorting containers into categories like square, rectangular, or round.
This organization simplifies stacking and retrieval, making your kitchen more efficient. Next, group containers of similar sizes together to reduce clutter and make matching lids easier during meal prep.
Keeping uniform shapes in one spot also prevents containers from toppling and streamlines nesting. Regularly review your groups to accommodate new containers and maintain your system’s effectiveness.
Stack Containers to Maximize Space
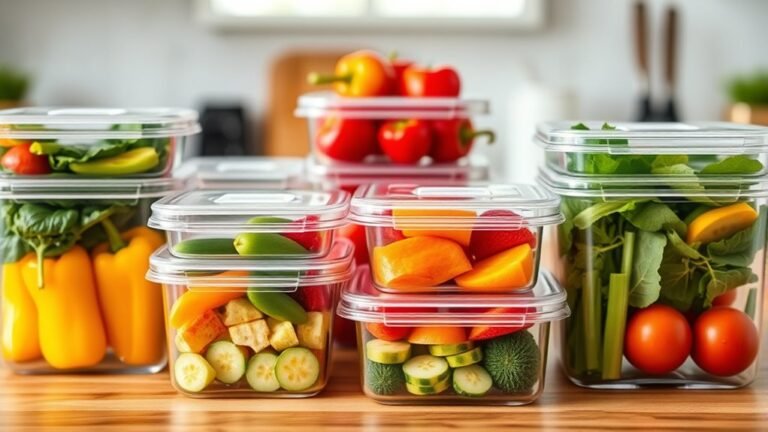
To maximize your cabinet space, stack glass containers of the same shape and size together for a compact, stable setup. Stacking containers this way prevents shifting and toppling, making the most of your vertical storage space.
Stack glass containers of the same size and shape for a stable, space-saving vertical arrangement in your cabinets.
Try nesting smaller containers inside larger ones to reduce clutter and save even more space. Breaking bulky sets into smaller groups can keep stacking manageable and make retrieval easier.
Keep these tips in mind for efficient stacking:
- Use uniform container shapes for stability.
- Incorporate stackable lids or organizers to keep lids handy.
- Nest smaller containers inside bigger ones to maximize vertical space.
These little tricks really help keep your cabinets neat and make the most out of the space you have!
Utilize Drawer Dividers and Organizers
When you add drawer dividers and organizers, you create dedicated spaces for both lids and containers. This cuts down on clutter and makes it easier to find what you need quickly.
Adjustable drawer dividers let you customize compartments to fit various container sizes. This maximizes vertical space and prevents shifting.
Clear, modular dividers enhance container organization by keeping lids separate from containers. That way, it improves lid storage and visibility.
Installing multiple small dividers within a drawer keeps matching glass food storage sets together. So, you don’t waste time searching.
To maintain efficiency, regularly clean and rearrange your drawer organizers. This ensures ideal use of space and easy access.
Using drawer dividers for lid storage and container organization streamlines your kitchen routine. Plus, it keeps your glass containers neat and accessible.
Install Shelf Inserts and Undershelf Baskets
Although cabinet space can feel limited, installing shelf inserts and undershelf baskets lets you create extra tiers that maximize vertical storage. These additions boost storage efficiency by utilizing space that often goes unused.
Shelf inserts help you organize containers by size or type, making it easier to find what you need quickly. Meanwhile, undershelf baskets are perfect for keeping lids, small containers, or accessories separate and clutter-free.
Both are adjustable and come in various sizes to fit your cabinet dimensions, giving you flexible options for customization. To enhance your storage efficiency, consider:
- Adding shelf inserts to double your cabinet layers
- Using undershelf baskets to separate smaller items
- Customizing sizes to fit your cabinet depth and width
This simple upgrade transforms your cabinet into a highly functional space.
Store Containers in Designated Sections
Maximizing vertical space with inserts and baskets sets the stage for even better organization by assigning specific sections for your glass containers. Dedicate a shelf or drawer exclusively for storage containers to simplify access.
Use dividers or baskets to separate containers by size or type. This keeps clutter at bay and streamlines your kitchen. Store lids nearby or in the same section, so pairing them is quick and hassle-free.
Place frequently used containers at the front of the designated area to reduce search time. Meanwhile, keep seasonal or rarely used containers in a separate section to maintain neatness and maximize space.
This methodical organization not only saves time but also makes your kitchen storage more efficient and visually appealing. It’s a simple change that makes a big difference!
Label Containers and Storage Areas
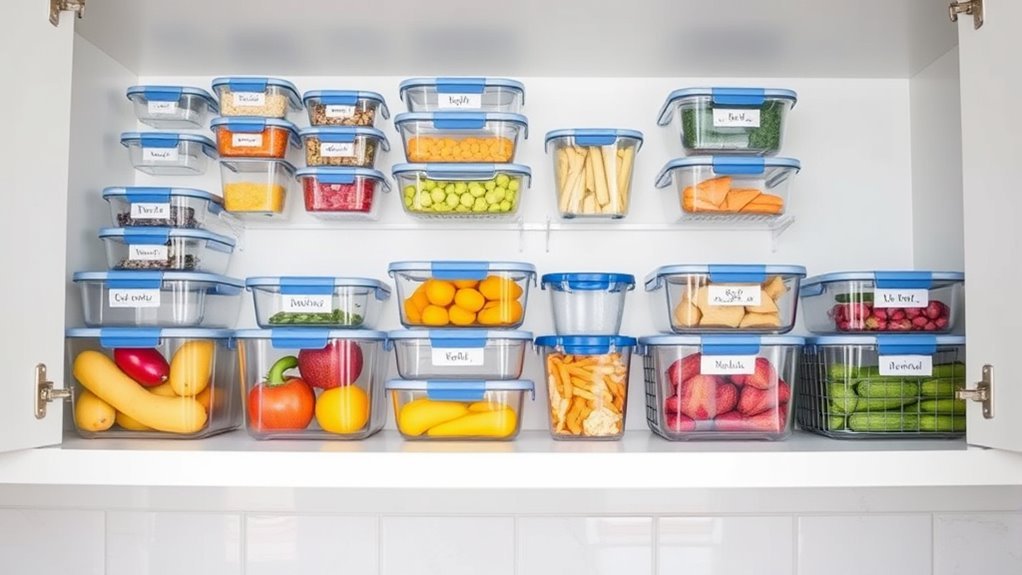
You’ll want to use clear, waterproof labels to mark your containers and storage areas for easy identification. Designate specific zones for lids, small containers, large containers, and seasonal items to keep everything in its place.
This way, you’ll save time searching and maintain a consistent, organized system. It really makes a difference when everything has its own spot!
Clear Labeling Methods
When you clearly label your glass food storage containers and their designated storage areas, you’ll save time and reduce frustration. Using waterproof, adhesive labels or printable sheets helps keep your labels legible and resistant to smudging.
A permanent marker or label maker guarantees durability when organizing food storage. Update labels regularly to match the contents and remove outdated ones for a tidy look.
To enhance clarity, consider these methods:
- Use color-coded labels to quickly identify categories like leftovers, snacks, or meal prep.
- Label storage bins or shelves by size, type, or usage frequency.
Write clear, easy-to-read labels with a permanent marker to avoid fading or peeling.
These simple steps keep your glass containers organized and accessible every time.
Designated Storage Zones
Although organizing glass food storage containers can feel overwhelming, setting up designated storage zones simplifies the process.
Label each zone clearly to separate lids and containers, making kitchen organization more efficient. Use color-coded or printed labels on shelves and containers for quick identification.
Allocate baskets or sections for different container sizes and create a dedicated spot for lids to keep them upright and accessible. Regularly update your labels and zones as your collection changes.
| Storage Zone | Purpose |
|---|---|
| Large Containers | Store bases by size |
| Small Containers | Group small bases separately |
| Lid Organizer | Keep lids upright and sorted |
| Matching Sets | Store lids and bases together |
| Labeling Area | Color-coded labels for zones |
This approach keeps your kitchen organized and clutter-free. It really helps save time when you’re in a rush!
Maintain Regular Organization and Review
Set a monthly reminder to declutter your glass containers and check for any damage or missing lids. Regularly evaluating their condition helps you keep only what’s useful and in good shape.
Updating your storage system based on your current needs will make finding and using containers much easier. It’s a simple habit that saves you time and frustration down the road.
Schedule Routine Decluttering
To keep your glass food storage containers in order, you should schedule a regular decluttering session every month or two. Routine decluttering helps you organize containers effectively and maintain a functional storage system.
It’s a good idea to use calendar reminders to prompt these sessions and avoid letting clutter pile up. That way, you stay on top of things without even thinking about it.
During your routine decluttering, start by removing damaged, broken, or mismatched containers and lids to free up space.
Then, reorganize containers and lids by size or type to make accessing them easier.
Finally, clean and inspect containers to ensure they’re ready for use and to help extend their lifespan. Simple steps like these keep your storage system working smoothly.
Assess Container Condition
Since glass containers endure frequent use, you should regularly inspect them for cracks, chips, or cloudiness to keep them safe and functional. Checking the container condition helps you prevent contamination and leaks that damaged glass containers might cause.
Discard any that show signs of damage or staining to maintain your kitchen’s safety and hygiene. Make it a habit to review your collection every few months, identifying unused or duplicate pieces for removal.
Before storing, clean each container thoroughly to prevent residue buildup and keep them clear. Also, designate a specific spot for damaged or unusable glassware to streamline disposal and replacement.
This routine assessment guarantees your glass containers remain reliable and organized, saving you time and effort in the long run. It really pays off to stay on top of it!
Update Storage Systems
Review your glass container collection every three to six months to keep your storage system efficient and clutter-free. This regular check helps you spot damaged or unused containers, ensuring your kitchen stays organized and safe.
To maintain effective storage systems, focus on these steps:
- Organize containers and lids separately in clearly designated spots to avoid mismatches and clutter. It really makes finding the right lid a breeze!
- Reorganize containers by size and shape during your review to maximize space and improve accessibility. You’ll be surprised how much room you can free up.
- Discard or repurpose broken, scratched, or stained containers to maintain a tidy and functional collection. Holding onto damaged containers just creates unnecessary mess.
Frequently Asked Questions
What Is the Best Way to Organize Glass Food Storage Containers?
You should nest containers by size, store lids separately in labeled baskets, and use clear bins or dividers for easy access.
Regularly discard damaged containers to keep your storage safe, tidy, and efficient.
This way, everything stays organized and easy to find when you need it!
Should Containers Be Stored With Lids on or Off?
You’d save a mountain of space by storing containers with lids off! It prevents moisture buildup, helps spot missing lids, and avoids warping.
Keep lids separate, clean, and dry—you’ll thank yourself later. Trust me, it makes organizing way easier!
What Is a Unique Method for Organizing Food Storage Containers?
Try using vertical dividers or tiered shelves to separate containers and lids. This unique method keeps everything visible and accessible.
Does Food Keep Better in Glass Containers?
Yes, food keeps better in glass containers because they seal tightly, preventing air and odors from spoiling your meals.
You won’t worry about stains or chemicals, so your food stays fresher, longer, and safer every time.
Conclusion
Think of organizing your glass containers like conducting a symphony—each piece has its perfect place, creating harmony in your kitchen. By decluttering, matching lids, stacking smartly, and labeling, you’ll transform chaos into calm.
Keep up with regular reviews to maintain this flow, making meal prep smoother and your space more inviting. With these tips, your storage won’t just hold containers; it’ll hold peace of mind.
Efficiently organizing glass food storage containers saves time and reduces frustration when searching for the right piece. Plus, it helps keep your kitchen tidy and maximizes space. So, take a little time to apply these strategies and enjoy a clutter-free, functional kitchen where everything is easy to find and ready to use.