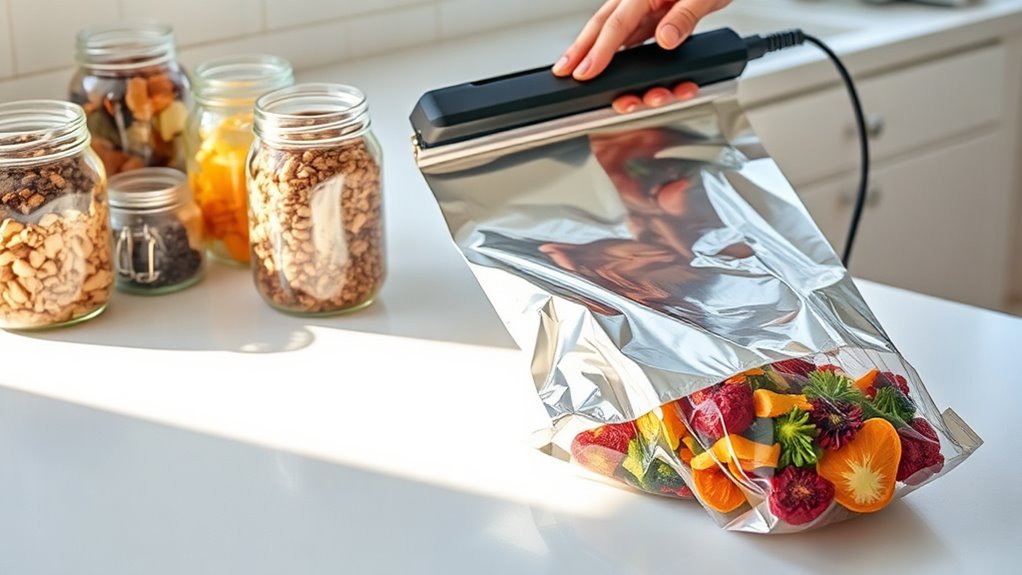
How Do You Use Mylar Bags for Food Storage in 10 Easy Steps
You start by choosing the right Mylar bag size to fit your portions and reduce waste. This step is key for effective food storage and helps keep your supplies organized. Next, cut larger bags if needed for meal-sized storage.
Add the correct oxygen absorber quickly, then press out air before sealing within 20 minutes to keep food fresh. It’s important to work fast here to lock in freshness.
Label each bag with contents and date, and store it in a cool, dry spot or freezer. These simple steps preserve your food long-term, and there’s more to explore for perfect results.
Key Takeaways
- Choose a Mylar bag size that matches your portion needs to reduce waste and optimize oxygen absorber use.
- Add the correctly sized oxygen absorber quickly, then fill the bag about one-third full before sealing to minimize air.
- Press down on contents to remove air, seal the bag firmly within 10–20 minutes using a heat sealer or backup tool.
- Label the bag with food name, quantity, absorber size, and packing date before sealing for easy tracking and rotation.
- Store sealed Mylar bags in a cool, dry place between 40–60°F, or freeze portioned items for extended shelf life.
Why Use Mylar Bags for Long-Term Food Storage

When storing food long-term, you want a container that blocks oxygen, moisture, and light—Mylar bags do just that. These bags have a thick foil laminate that offers an extremely low Oxygen Transmission Rate (OTR), protecting your food from oxygen-related spoilage.
Their three layers shield against moisture, light, and odors, so your food’s nutrients and flavors stay intact. The opaque material blocks harmful light, while the bags remain thin yet strong and puncture-resistant for durable storage.
Pair Mylar bags with oxygen absorbers to remove oxygen inside, preventing spoilage and even killing insect eggs. This combo can extend your food’s shelf life by months or even up to 30 years.
Just store sealed bags in a cool spot, label them, and you’re set for successful long-term food storage. Easy, right?
Choose the Right Size Mylar Bag for Your Food

You’ll want to choose a Mylar bag size that matches how much food you plan to use at once to avoid waste.
If you can’t find the perfect size, you can cut larger bags and seal them to fit your portions.
This also helps when using oxygen absorbers, since bag size affects how many you’ll need.
Bag Size Selection
Although selecting the right mylar bag size might appear straightforward, choosing one that fits your actual portion needs is important for effective food storage. Pick a bag size based on how much you’ll use at once—smaller bags often don’t align with real portions, and larger ones can be trimmed and sealed after filling.
For example, 1-gallon bags cut in half work well for about two servings, sealing one end before filling the other. Always use the recommended oxygen absorber size that fits your chosen bag volume to ensure the contents stay sealed and fresh.
Avoid overfilling or repeatedly opening bags, since selecting a properly sized bag helps keep your food sealed and preserved for long-term storage without waste or spoilage. It’s all about finding that sweet spot to keep your food fresh and ready when you need it.
Portioning Food Quantities
Selecting the right Mylar bag size sets the stage for proper portioning of your food quantities. You want to pick a size that matches how much you typically use per meal or recipe.
Instead of storing food in one large bag, portion it into smaller amounts to avoid waste and make grabbing portions easier. For example, a gallon Mylar bag can hold about two servings if cut in half, offering convenience and cleaner use.
Applying the “fewer full bags” rule helps—you’ll open bags that fit your usual serving sizes, so you won’t leave partially used, unsealed bags behind. If you know you won’t use all the food at once, start with smaller Mylar bags to keep your storage fresh and manageable.
Cutting Larger Bags
Cut larger Mylar bags to create perfectly sized portions that match your meal needs. If you find smaller bags inconvenient, cutting larger bags—like a 1-gallon size—in half lets you seal the cut end and fill just what you’ll use at once.
This approach prevents waste and optimizes storage since many foods aren’t practical to consume from a whole bag. Two servings often fit well in half a gallon bag, making it an ideal portion size.
Plus, cutting larger bags can save money because bigger bags usually cost less per unit. For planned meal mixes, cutting larger bags lets you separate and portion components like freeze-dried biscuits and gravy, so you have the right amounts ready for later without extra packaging.
Portion Your Food to Fit Mylar Bags and Avoid Waste
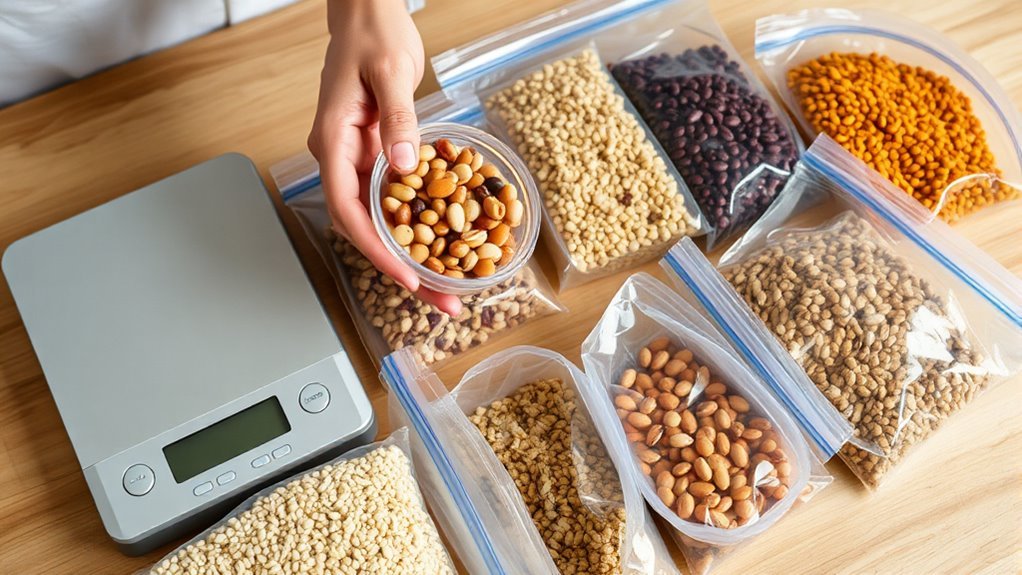
You’ll want to choose Mylar bag sizes that match how much you typically eat in one serving to prevent leftover food.
If smaller bags aren’t handy, you can cut larger bags, like gallon-sized ones, in half and reseal them for convenience. This way, you avoid waste and keep your food storage organized and easy to manage.
Bag Size Selection
Because most foods aren’t eaten all at once, picking mylar bag sizes that match your typical portion helps prevent waste. When selecting bags for food storage, focus on how much you actually consume in one sitting.
Oversized bags can lead to leftovers that spoil, while undersized bags may not hold enough. So, it’s really about finding that sweet spot for your meals.
Keep these tips in mind for bag size selection:
- Choose bags that fit common meal portions to avoid unnecessary leftovers.
- Consider buying larger bags and cutting them in half for cost-effective, portion-sized packaging.
- Store meal components separately so each bag holds only what you’ll use together.
- Seal one end of the bag before filling to maintain airtight freshness for each portion.
This approach keeps your food storage efficient and waste-free. It just makes things easier and saves you from throwing away food.
Cutting Larger Bags
A smart way to save money and reduce waste is to buy larger mylar bags and cut them into portions that fit your typical meal sizes. For example, gallon-size bags can be cut in half to hold about two servings, which is perfect for dinner portions or sides.
Start by sealing one end of the cut bag, then fill it with your food before vacuum sealing and heat-sealing the other end. This method keeps your food protected and avoids wasting space inside the bag.
If you store multiple components like freeze-dried biscuits and gravy, use separate cut portions to stay organized. Using smaller portions also prevents filling a whole bag with just a little food, ensuring every vacuum sealed packet is efficient and ready to use.
Cut Larger Bags for Smaller Portions and Easy Storage
When storing food, cutting larger mylar bags into smaller portions helps you save space and reduce waste. By cutting larger bags for smaller portions and easy storage, you can better manage your food supplies and avoid opening more than you need.
Cutting large mylar bags into smaller portions saves space, reduces waste, and helps manage your food supplies efficiently.
Start by sealing one end of a large bag, then cut it to fit the portions you want. Plan your servings so each smaller bag holds about two servings, making future use simple.
Remember, bigger bags often cost less, so cutting them saves money too.
Consider these tips:
- Cut gallon bags in half or thirds for portion control
- Seal one end before filling
- Store meals and veggies in bags sized to your servings
- Plan portions ahead to avoid unused full bags
Add Oxygen Absorbers to Mylar Bags to Extend Shelf Life
If you want to keep your stored food fresh for years, adding oxygen absorbers inside your sealed mylar bags is essential. These absorbers remove oxygen that speeds spoilage and prevent insect eggs from surviving.
Choose the right size absorber for your bag, seal the bag quickly, and store it in a cool, dry place. Oxygen absorbers usually take 2–4 hours to work and shouldn’t be exposed to air longer than 20 minutes.
This method extends the shelf life of your long-term food by creating a vacuum-like environment inside the bag, preserving freshness for decades.
| Bag Size | Absorber Size | Approximate Shelf Life |
|---|---|---|
| 1 Quart | 100cc | Up to 20 years |
| 1 Gallon | 300cc | 20–30 years |
| 5 Gallon | 500cc | 25–30 years |
Fill Mylar Bags in Layers for Better Storage Control
Although sealing an entire Mylar bag at once might seem faster, filling and sealing it in layers gives you greater control over storage quality. Start by filling the bag about one-third full, then heat-seal it firmly before adding the next layer.
Filling and sealing Mylar bags in layers enhances storage quality and control for fresher results.
Using a vacuum sealer for each layer helps minimize air exposure, preserving freshness throughout the bag. It’s a simple step that really pays off.
Layering benefits include:
- Reduces oxygen exposure by sealing smaller sections
- Keeps portions separate for easy access
- Prevents moisture buildup during filling
- Allows gradual filling without long openings
Just repeat this process until the bag is full, sealing quickly and firmly each time. This method ensures better storage control and protects your food more effectively than filling and sealing all at once.
Remove Air From Mylar Bags Before Sealing
Before sealing your mylar bags, you need to remove as much air as possible to keep oxygen from spoiling your food. Press down on the contents to push out air, then seal quickly using a heat sealer to lock in freshness.
Timing is key since oxygen absorbers start working fast. You don’t want to leave the bag open too long.
Importance of Oxygen Removal
Since oxygen speeds up spoilage and reduces shelf life, you need to remove as much air as possible from your Mylar bags before sealing them. Removing oxygen preserves the quality of the food you store in the bags inside your pantry or cellar. This step is crucial because oxygen triggers spoilage and nutrient loss.
Keep in mind these key points:
Use the correctly sized oxygen absorber for your bag size to actively remove residual oxygen. Add the absorber quickly to prevent it from losing effectiveness when exposed to air.
Seal the bags inside swiftly to give the absorber time (2–4 hours) to work properly. After sealing, check for leaks and reseal if air escapes, ensuring long-term freshness.
Techniques for Air Extraction
A dependable way to remove air from Mylar bags is by using a chamber vacuum sealer, which makes certain maximum air extraction and compatibility with the bag material. If you don’t have one, you can still push or squeeze the air out before sealing.
To seal, use a clamshell or impact heat sealer for the best results, but a flat iron or hair straightener works as a reliable backup to create a strong seal. Make sure to seal quickly to keep oxygen absorbers effective inside.
Avoid microwaving Mylar bags or oxygen absorbers, as the foil can cause damage and ruin air extraction. If you notice air returning after sealing, wait a day and reseal the bag to maintain freshness.
Timing Before Sealing
When you add oxygen absorbers to your Mylar bags, seal them as soon as possible to make sure they begin working effectively. Oxygen absorbers start removing air within 2–4 hours, so timing is essential for Emergency Preparedness.
Don’t expose absorbers to open air for more than 30 minutes—ideally only 10–20 minutes—to keep them effective. After filling your bags, promptly heat-seal to trap minimal oxygen inside.
After sealing, wait a day and check for air leaks by squeezing; reseal if needed. It’s a simple step that can save your food from spoiling.
Keep these tips in mind:
- Add oxygen absorbers just before sealing.
- Limit absorbers’ air exposure to under 30 minutes.
- Seal bags quickly after filling.
- Test seals and reseal if air escapes.
This timing ensures your stored food stays safe and fresh longer. So, a little care here goes a long way!
Seal Mylar Bags Quickly and Securely for Protection
Although adding oxygen absorbers is crucial, you need to seal Mylar bags quickly to guarantee they start removing oxygen effectively. After placing your food in Mylar, like brown rice, add the absorbers and seal the bag within 10–20 minutes to prevent them from activating too soon.
Use a reliable heat-sealing method—clamshell or impact heat sealers work best, but a flat iron or hair straightener can do in a pinch. Make sure the seal is airtight to protect your food in Mylar bags for the long term.
After sealing, wait at least a day, then check for leaks by squeezing the bag; if you feel air escaping, reseal it immediately. Oh, and avoid microwaving sealed Mylar bags, since their foil layers can be hazardous.
Label and Date Each Mylar Bag Clearly
Clear labeling and dating of each Mylar bag is vital to keep track of your stored food and oxygen absorber specifics. Before sealing, write the food name, quantity, and the exact oxygen absorber size or number you’re using directly on the bag.
Add the packing date to track shelf life and rotate stock efficiently. Use clear, consistent labels to prevent confusion since absorber sizes vary by bag capacity.
Keep all info on the bag itself, not just a separate list, so it stays with the package for years.
- Include food name and quantity
- Specify oxygen absorber size/number
- Add precise packing date
- Use clear, legible labeling on the bag
This simple step ensures you manage your Mylar storage with confidence and ease. It really makes a difference!
Store Mylar Bags Properly, Including Freezer Storage Tips
To maximize the shelf life of your Mylar-stored food, be sure to keep the bags in a cool, dry place with temperatures between 40 and 60°F. This range helps oxygen absorbers work effectively and extends your food’s freshness.
For freezer storage, portion items like hamburger meat before sealing in Mylar bags. This makes handling easier and speeds up defrosting. Remember, Mylar bags are freezer-safe but never microwave them, as the foil can be damaged.
When using oxygen absorbers, seal the bags quickly—within 10–20 minutes—and let the absorbers work for 2–4 hours. After sealing, wait a day, then check for any air leaks by squeezing the bag.
If you find any, reseal to ensure a tight, freezer-ready pack that preserves your food properly.
Frequently Asked Questions
How Do I Store Food in Mylar Bags?
You portion food, add the right oxygen absorber, then fill and seal the mylar bag quickly in layers.
Label it, check the seal, and store it in a cool, dry place to preserve freshness effectively.
It’s pretty simple once you get the hang of it! Just take your time to make sure everything’s sealed tight.
How Long Will Instant Oatmeal Last in Mylar Bags?
Instant oatmeal can last several years in mylar bags, especially if you include oxygen absorbers and seal them quickly.
Just make sure to store the bags in a cool, dry place. This helps keep the flavor and nutrients intact for longer.
It’s pretty simple but super effective for long-term storage!
How Thick Should Mylar Bags Be for Food Storage?
You should use thick, multilayer mylar bags with low oxygen transmission rates for food storage. Aim for foil-laminated bags that resist moisture, light, and punctures.
Match the thickness to your food type and how long you plan to store it. That way, your food stays fresh and protected for longer.
How to Take Air Out of Mylar Bags?
Like squeezing the last bit of toothpaste, press out excess air before sealing your Mylar bag quickly with a heat sealer.
Don’t wait too long—oxygen absorbers start working fast and you want as little air trapped as possible.
Conclusion
Using Mylar bags for food storage is a smart way to keep your supplies fresh and ready. Remember, “a stitch in time saves nine”—taking these simple steps now saves you from food spoilage later.
Choose the right size, add oxygen absorbers, and seal bags tightly to protect your food. Label everything clearly and store your bags properly.
With a little care, your food will stay safe and tasty for the long haul. Using Mylar bags not only extends the shelf life of your food but also protects it from moisture, light, and pests. So, whether you’re prepping for emergencies or just want to keep pantry staples fresh, Mylar bags are a reliable and easy solution for long-term food storage. Just follow these easy steps, and you’ll enjoy fresh, well-preserved food whenever you need it.