7 Tips to Organize Your Food Storage Room Efficiently
To organize your food storage room efficiently, start by decluttering and tossing expired items. Group similar foods together for easy access and better organization.
Use clear bins, baskets, and door organizers to keep everything visible and tidy. These tools help you find what you need quickly without digging through piles.
Add shelf liners and risers to maximize space and prevent messes. This way, you can store more items neatly and avoid spills.
Place frequently used items at the front to save time during meal prep.
Also, label containers clearly for quick identification, so nothing gets lost or forgotten.
Keep these simple tips in mind, and you’ll find even more ways to streamline your pantry setup.
Organizing your food storage room doesn’t have to be overwhelming when you have a plan!
Key Takeaways
– Empty and declutter your pantry, removing expired items and grouping foods by regular and infrequent use zones.
It’s a great way to get a clear view of what you have and what you actually need.
– Group similar foods together and rotate stock by placing new items behind older ones to prevent waste.
This simple trick keeps everything fresh and saves you money in the long run.
– Store frequently used items at eye level or front shelves for easy access and tuck rarely used products in higher or back areas.
That way, your everyday essentials are always within reach.
– Use clear bins, shallow baskets, and organizers like lazy Susans or can feeders to maximize visibility and accessibility.
These tools make it super easy to find what you need without digging around.
– Keep shelves clean with liners, utilize vertical space with risers, and label containers clearly for quick identification.
A tidy shelf makes your pantry look great and helps you stay organized effortlessly.
Declutter and Group Pantry Items for Easier Organizing
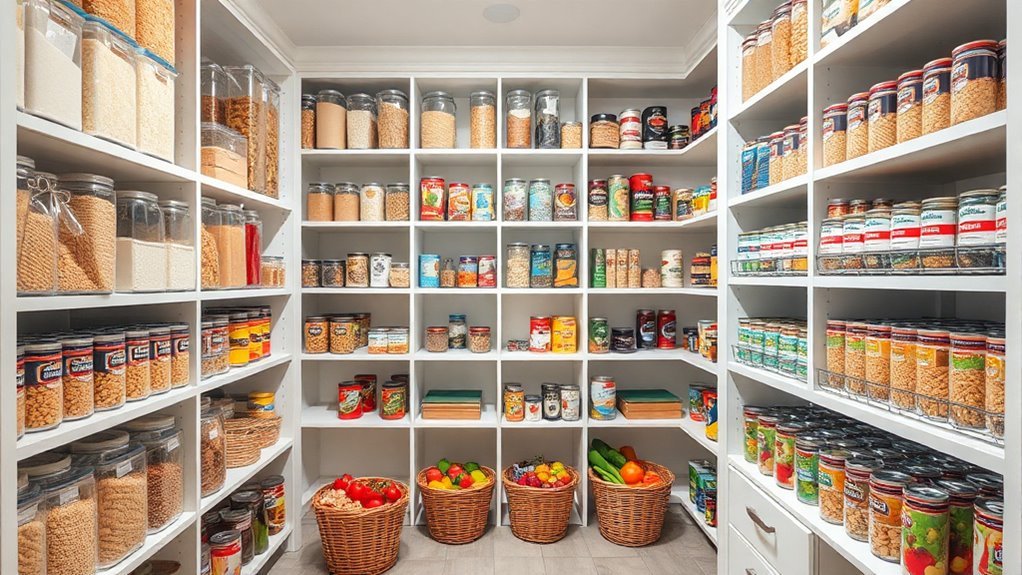
Before you start organizing, empty your pantry completely and check every item’s sell-by date, including spices. Removing expired or unlikely-to-use items gives you a clean slate for effective pantry storage.
Start by emptying your pantry and checking sell-by dates to remove expired or unused items for a fresh start.
Next, sort everything into “regular use” and “infrequent use” groups. Assign each group a consistent zone so nothing gets lost in the back.
Group similar foods together—like tinned tomatoes with tinned tomatoes or baking items in one area. This will simplify your pantry organization. Just avoid overly detailed categories that complicate maintenance.
When you refill, place new items at the back to rotate older ones forward. This helps prevent waste.
Finally, wipe down all pantry surfaces to eliminate grease and residue. It makes ongoing storage tidier and easier to manage.
This method streamlines your pantry storage and boosts your kitchen efficiency.
Select the Right Pantry Baskets, Bins, and Organizers

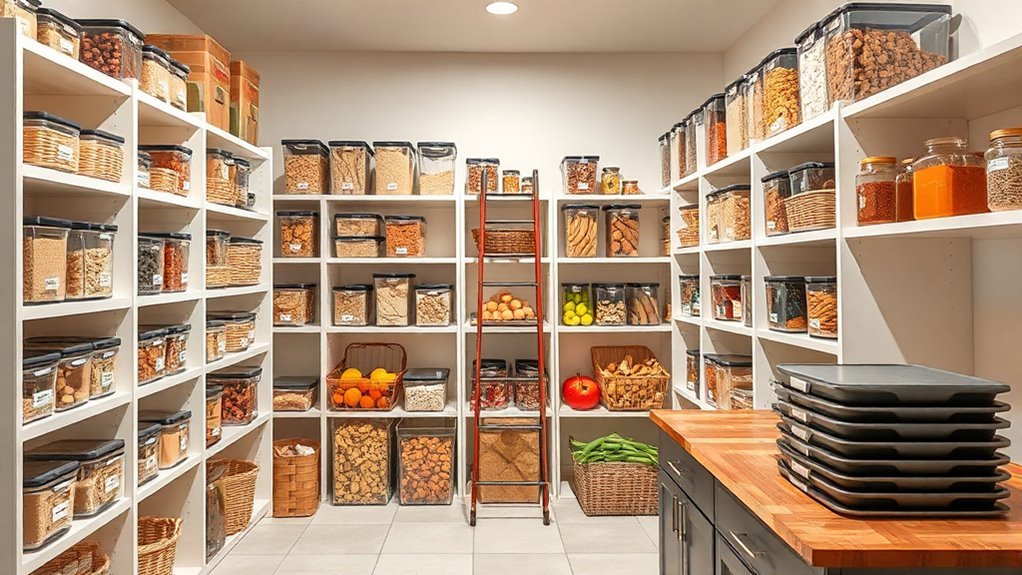
When you choose the right pantry baskets, bins, and organizers, you make it easier to find and access your food while keeping everything neat. Opt for shallow storage baskets so you can quickly spot items without digging.
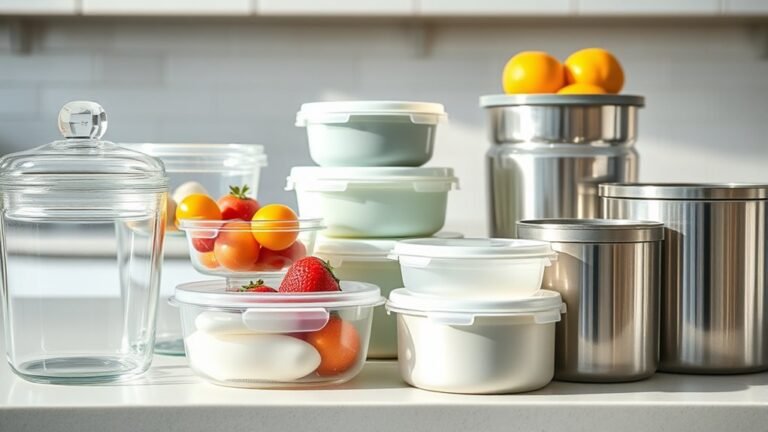
Use clear bins or glass canisters for dry goods to maintain a uniform look. Install door organizers with multiple pockets to keep spices and snacks within easy reach.
Consider a raised-edge Lazy Susan for bottles or jars, preventing spills and making access simple. Multi-tier gravity can feeders also help keep cans visible and orderly.
- Shallow storage baskets for easy access
- Clear bins or canisters for dry goods
- Door organizers with pockets for small items
- Raised-edge Lazy Susan to prevent toppling
- Multi-tier can feeders for neat stacking
Use Shelf Liners to Prevent Mess and Stabilize Shelves

You’ll need to use shelf liners to stop spills from slipping through wire shelves and creating a mess. Choosing durable liners with locking tabs keeps everything stable and prevents shifting when you move heavy items.
Cutting liners to fit perfectly guarantees your containers stay secure and easy to access. It really makes a difference in keeping your shelves neat and organized. Plus, it’s super simple to do!
Prevent Spills And Gaps
By placing wire-shelf liners under your dry goods, you make sure spills don’t fall through gaps and create messes or lost items. Wire-shelf liners help prevent spills while maximizing your storage space by creating a smooth, stable surface.
To keep your shelves tidy and efficient, consider these tips:
- Choose liners with locking tabs to keep them securely in place.
- Use thicker liners for a smooth surface that prevents boxes and bags from snagging.
- Ensure liners fully cover shelves to block gaps and exposed edges.
- Prevent dry goods like cereal or flour from slipping through wire gaps.
- Maintain even shelving by supporting wire grids with liners.
Using wire-shelf liners not only prevents spills but also helps keep your storage space clean and organized. It’s a simple step that makes a big difference!
Stabilize Items On Shelves
Although wire shelves offer great ventilation and strength, they can make it tricky to keep your items stable and mess-free. Using wire shelf liners with locking tabs creates a smooth, stable surface that prevents spills and keeps items in your pantry from slipping through gaps.
Thicker liners like Shelf-IT style help prolong shelf life by reducing mess buildup and making cleaning easier. Just cut liners to fit snugly, covering all openings to avoid snagging bag corners or box lids.
| Benefit | Reason |
|---|---|
| Stabilizes pantry items | Prevents tipping and sliding |
| Prevents mess | Stops spills from falling through gaps |
| Extends shelf life | Keeps surfaces clean and damage-free |
Wire shelf liners are essential for an organized, efficient pantry. Trust me, once you try them, you’ll wonder how you ever did without!
Choose Durable Liners
When lining your wire shelves, choosing durable shelf liners with locking tabs can make a huge difference in keeping your storage neat and stable. These liners prevent shifting and create a smooth surface that stops spills from falling through gaps, making cleanup easier.
When organizing a pantry, especially behind the door where space is tight, durable liners help keep items secure and aligned. They really make a difference in tight spots!
Here’s why you should use them:
- Locking tabs keep liners firmly in place
- Thick, smooth liners prevent bag corners from catching
- Create a continuous surface to catch spills
- Improve shelf stability on uneven wire racks
- Simplify maintenance by wiping or replacing liners
Using quality liners means your pantry stays cleaner and your items stay put. It’s an easy way to keep everything looking tidy and organized.
Add Risers and Drawers to Maximize Vertical Space
Maximizing vertical space in your food storage room starts with adding risers and drawers to your shelves. Installing risers helps you make space by using the full vertical height, preventing tall and short items from mixing up and reducing wasted air above.
You can create two-level storage for similar items—for example, baking staples on one tier and breakfast goods on another. This makes everything easier to find.
Adding under-shelf drawers is a smart way to store small, frequently used items like snack bars or spice blends. These drawers slide out smoothly, so you won’t have to dig around.
Choose adjustable risers and shallow drawers to avoid dead space and keep your shelves clutter-free. Place taller, heavier items on lower risers and lighter ones above for stability and maximum storage.
Use Gravity Can Feeders and Lazy Susans to Keep Cans and Random Items Tidy
To keep your canned goods and miscellaneous pantry items organized, use gravity can feeders and lazy Susans. Gravity can feeders with multiple tiers let you pull the front can forward, automatically rolling the next into place.
Lazy Susans with raised edges keep bottles and random items contained and easy to reach. These tools help minimize food waste by promoting easy access and rotation.
Here’s how to get the most from them:
- Load gravity can feeders by category for neat columns
- Use 2–3 cans per tier, with up to 3 tiers per feeder
- Place feeders and lazy Susans front and center in your pantry
- Rotate lazy Susan items regularly to use older stock first
- Choose lazy Susans with taller sides to prevent spills and clutter
This setup keeps your food storage tidy and efficient. Give it a try—you’ll love how easy it is to find what you need!
Label Containers and Shelves for Quick Identification
Although organizing your food storage can feel overwhelming, labeling containers and shelves makes finding ingredients quick and hassle-free. Use a label maker, like a Brother P-Touch, to label each bin, jar, and shelf with ingredient names and, if helpful, the date opened.
Place items in consistent zones—such as sauces, canned goods, or baking supplies—to keep everything orderly. Make sure your labels are uniform and legible, so dry goods like flour and sugar are easy to identify without opening containers.
For plastic bins, you can write on them with an EXPO Dry Erase Marker for quick updates and clean off residue with a Magic Eraser when relabeling. Position labels at eye level and align identical products in neat rows to speed up retrieval and reduce rummaging.
Place Frequently Used Items at the Front for Easy Access
You’ll want to create accessibility zones by placing your most-used items within easy reach, like on lower or front shelves. Organize your pantry based on how often you use each product to keep daily essentials handy.
Optimizing shelf placement this way saves time and reduces frustration when you’re cooking or baking. It just makes everything easier to find when you need it!
Prioritize Accessibility Zones
When organizing your food storage, placing frequently used items at the front makes grabbing what you need quick and effortless. Prioritize accessibility zones by reserving prime spots for items you use regularly, so you maximize available space and reduce daily digging.
Keep less-used products tucked away in higher or back shelves. To set up your zones effectively:
- Store weekly-used items at eye level or front shelves.
- Place seasonal or rarely used foods toward the back.
- Arrange taller items behind smaller ones for visibility.
- Face identical products forward for quick label scanning.
- Rotate stock by putting new items behind older ones.
This system helps you access what you need instantly while keeping your storage neat and efficient. It’s all about making life easier every time you open your pantry!
Organize By Usage Frequency
Frequently used items deserve the most accessible spots in your food storage to streamline meal prep and minimize hassle. Make sure to place staples like flour and sugar at eye or hand level so you don’t have to dig around when you need something quickly.
Grouping items by usage frequency helps you maintain order—keep everyday products in front rows or dedicated baskets for easy grabbing. Reserve rarely used or taller items for the back or higher shelves, preventing them from blocking frequently accessed goods.
Follow a rotation rule by pushing newly bought items to the back and using older ones first. This way, your high-use zones stay stocked with what you actually need, making your storage efficient and your cooking smoother every day.
Optimize Shelf Placement
Keeping your most-used items within easy reach saves time and effort during meal prep. To optimize shelf placement, make the space work for you by keeping items you use daily right up front.
This way, you won’t have to dig through clutter or knock over canned goods each time you cook. Here’s how to organize smartly:
- Place frequently used staples like flour and sugar at the front.
- Keep rarely used or bulk items on higher shelves or in back corners.
- Arrange items by height and stability: heavier goods lower, fragile items reachable.
- Use a front-to-back rotation: new items behind older ones.
- Face products forward and group similar items in neat rows.
This setup streamlines access and helps you keep items visible and easy to grab. Easy, right? Just a few tweaks and your kitchen will feel so much smoother!
Frequently Asked Questions
How Often Should I Clean and Sanitize My Food Storage Shelves?
You should clean and sanitize your food storage shelves at least once a month. If you notice spills or pests, do it immediately to keep everything safe and fresh.
Regular checks help prevent contamination. It’s a simple habit that goes a long way in keeping your food safe. Just a little effort can make a big difference!
What Is the Best Way to Store Bulk Dry Goods Long-Term?
Did you know 25% of stored food goes to waste? To store bulk dry goods long-term, use airtight containers.
Keep them in a cool, dark place, label with dates, and rotate stock regularly to maintain freshness and avoid spoilage.
It’s a simple way to save money and reduce waste. Give it a try!
Can Temperature Fluctuations Affect Pantry Food Quality?
Yes, temperature fluctuations can spoil your pantry food’s quality. They cause moisture buildup and promote mold or pests.
How Do I Prevent Pests in My Food Storage Room?
You can prevent pests by sealing containers tightly, cleaning spills immediately, and inspecting food regularly.
Keep your storage room dry and well-ventilated, and use natural repellents like bay leaves or cedar to deter unwanted critters.
These little steps really help keep your food safe and pest-free. Just a bit of regular care goes a long way!
What Types of Lighting Are Ideal for Pantry Organization?
You’ll want to use bright, energy-efficient LED lights with a daylight color temperature. They illuminate your pantry clearly without generating heat.
This helps you find items easily while keeping food fresh and preventing spoilage. Plus, LED lights are great because they don’t add extra warmth that could affect your pantry’s contents.
Conclusion
Organizing your food storage room isn’t just about neatness—it can actually save you money. Did you know that the average household wastes about $1,500 annually on spoiled food? That’s a lot of cash just going to waste!
By decluttering, grouping items, using the right organizers, and labeling everything, you’ll reduce waste and make meal prep easier. It’s amazing how much smoother things go when you know exactly where everything is.
Plus, keeping frequently used items within reach means less stress and more efficiency. You’ll spend less time searching and more time enjoying your meals. So, start today and enjoy a cleaner, smarter pantry that helps you save money, reduce food waste, and make your kitchen routine a breeze!